Top 3 tips for working with Articulate Storyline
Top 3 tips for working with Articulate Storyline

Make a good player - and save it.
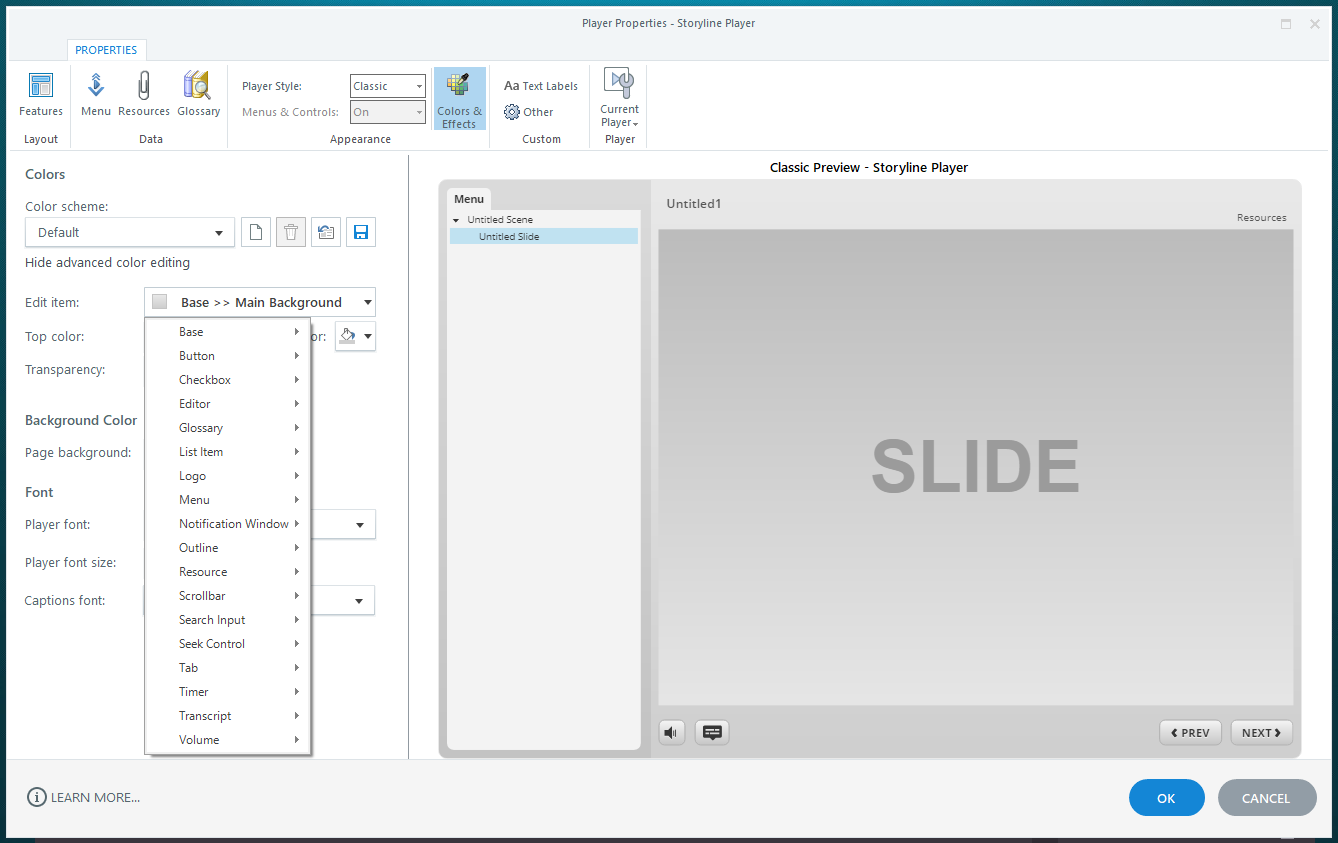
When designing your player, there are a lot of customization options and it can take a long time to get the player to look the way you want. But take your time and remember to save the player so you can reuse it again and again. The player can also be shared with others. You do this by going to the player. Press Current Player and select Export to export your player to a file that you can send to others. And if you need to import a player, you of course select Import .
Here at the house we are of the belief that the player should not take up too much visually, as the focus should be on the content. That is why we have created a simple and clean player that we use as a starting point when we start a new project. Then it is easy to customize it with the colors and fonts that suit the project in question. (At the bottom of this page you have the opportunity to download our player.)
Please note that in the player settings you can lock the player to a fixed size regardless of screen resolution. You can also set the player to scale depending on the screen size of the user so that it automatically adapts. This is good to know before you decide what story size your project should have.
Name your slides
Now you are ready to start your e-learning project and from the start it is very important that you name your scenes and slides. The names of your slides will be used as a menu and it will also give you an overview. However, you can give other names to your slides in the menu in the player settings if you wish. It is generally a good idea to name everything you use in your project. Graphics, sounds, images, speech, layers on the timeline, etc. should be named so that you can better navigate your project.
As for your slides, you can, just like in PowerPoint, create slide masters if you want to work with a fixed design template for the different types of slides in the future. Slide masters are templates that cover all types of slides that can be used in an e-learning project. You can design them to look the way you want and reuse them over and over again.
If you would like to know more about slidemasters, you can read about it here: https://community.articulate.com/series/74/articles/articulate-storyline-360-user-guide-how-to-use-slide-masters
Working with the timeline and Cue Points
When arranging your objects as layers on the timeline, it can be a bit difficult to keep the chrome-plated overview. An obvious good tip is of course to be disciplined and remember to name the different layers on the timeline.
Since speech is often the last thing you add, it's a good idea to have your speech consistently on the top layer. This makes it much easier when you have to time animations and other things with what is said in the speech.
I've saved the very best tip for last. When I found out about this, I was pretty excited because it really helps me keep track.
When developing in Articulate Storyline, you often spend a lot of time synchronizing animations to what is being said in the speech so that objects are shown at the right time in relation to the speech. Since it can often be difficult to see from the audio when to show an object, it is a good idea to use cue points on the timeline.
The red boxes in the screenshot below represent cue points.
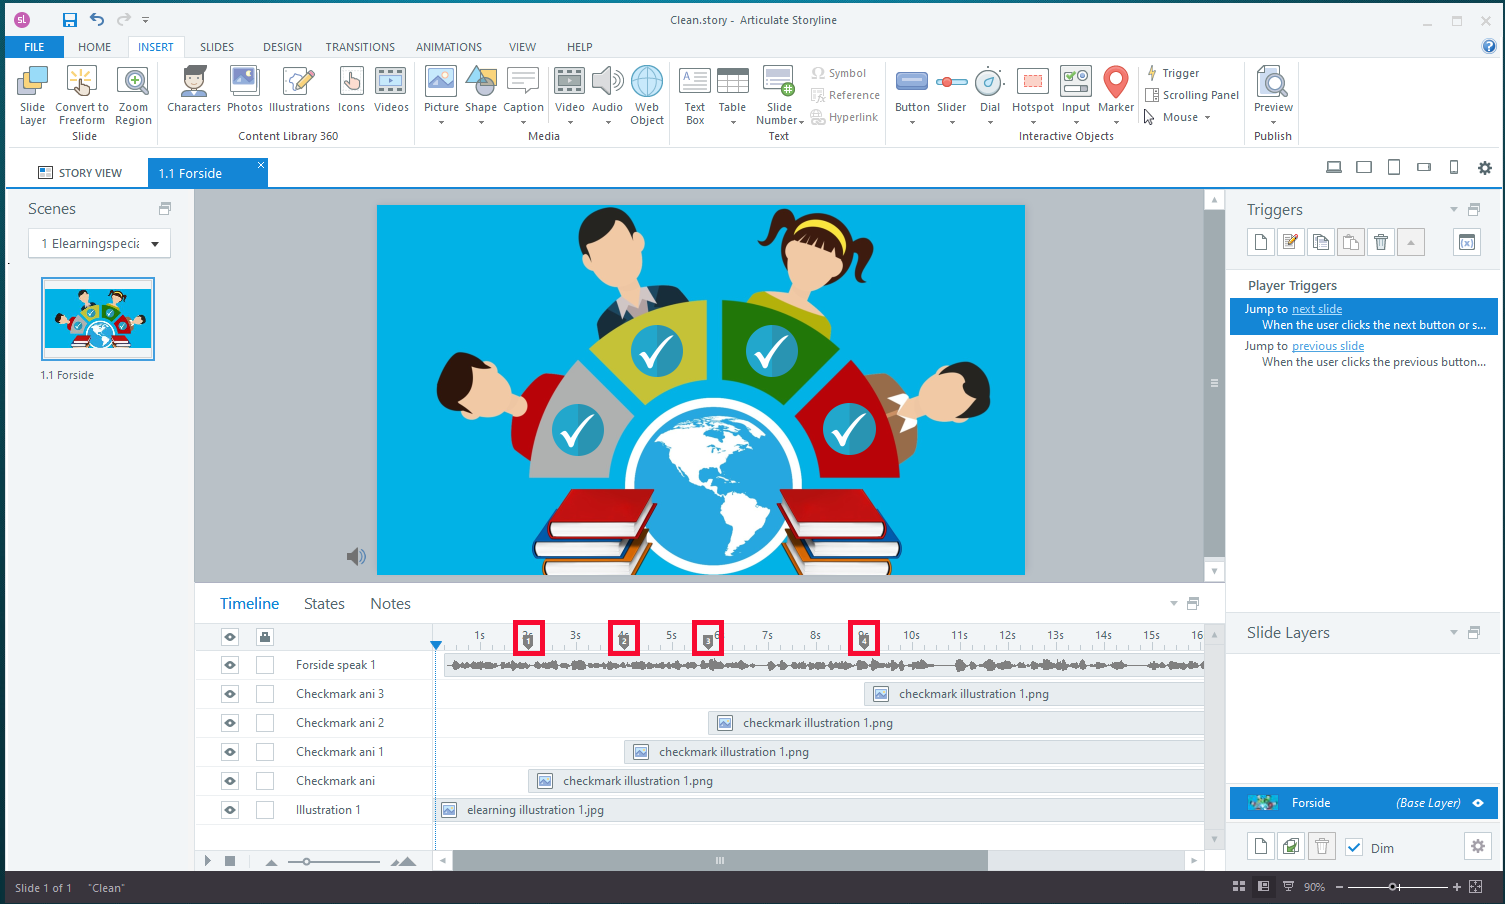
You can create cue points by right-clicking on the timeline and selecting Create Cue point at Playhead, but the easiest way to create cue points is to use a keyboard shortcut.
How to do it:
Click on play in the timeline so you can hear the speech while the timeline is running (but without having to open your page in Preview).
Every time something is going to happen that is related to what is being said, you press “C” on your keyboard to set a cue point on the timeline. A numbered cue point will then appear on the timeline, so you know that this is where an animation is going to start, for example.
But “C” is far from the only keyboard shortcut. You can find a list of them all here: https://community.articulate.com/series/74/articles/articulate-storyline-360-user-guide-how-to-use-keyboard-shortcuts
Hope you find these tips useful. Send us an email if you have a tip you think should be included in this overview.
Do you want to? learn more?
We hold courses in Articulate Storyline , where you can learn in one day how to create e-learning with text, audio, images, animation, quizzes and interactivity.
If you'd rather learn it on your own, will these articles might interest you.
- Self-determination theory. The most important theory you need to know about learning.
- Coercive design – how not to design e-learning .
- Your brain is NOT a computer - Predictive Coding
- Flick 2 learn. Why Interactive elearning is NOT always exciting elearning
- Gamification
If you want to know more about the technology behind digital learning and e-learning, you can read our E-learning FAQs .
... and if you are looking for a supplier for e-learning development - then give us a call.